
Introduction
Exciting news is rolling out to your Microsoft 365 environments right now! A new customizable feature is coming to SharePoint. This feature gives your users new ways to interact with your team sites and communication sites. In this blog post, I’ll break down how this SharePoint site dashboard works, how to configure it, and more. Let’s dive in!
Overview of the New Dashboard Feature
So, what exactly is this new SharePoint site dashboard feature? If you’re familiar with Viva Connections, then this is essentially a Viva Connections dashboard that will be available on every one of your sites instead of just the SharePoint home site or other select sites. This means you can now have a personalized dashboard for all your departmental sites, project sites, and more. The best part is that it doesn’t require any licensing at all. It’s completely free!
Key Features of the Dashboard
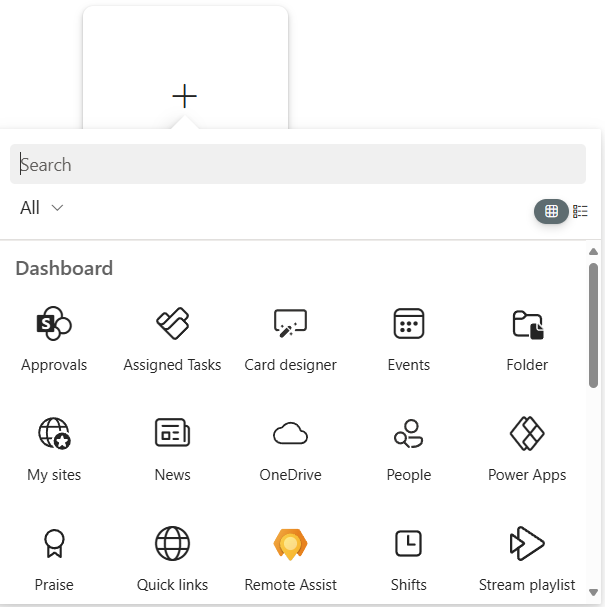
The new dashboard feature comes with a variety of cards that you can add to customize your dashboard. These cards are not just regular SharePoint web parts; they are adaptive cards and adaptive card extensions. You can also develop your own using the SharePoint Framework (SPFx). Here are some of the cards you’ll have out-of-the-box:
- Events Card: Display events from your site, site collection, or all sites. You can customize the card size and the events list it pulls from.
- My Sites Card: Show the sites that the user follows, providing a personalized experience.
- Folder Card: Provide quick access to particular files or folders, making it easy for users to find what they need.
- Power App Card: Embed a Power App directly into the dashboard.
- People Lookup Card: Add a card to look up people within your organization.
- Viva Learning Card: Integrate Viva Learning content into your dashboard.
- Adaptive Card Designer: Create custom adaptive cards without being a developer.
How to Configure the Dashboard
Configuring the dashboard is actually really simple for what you get! Here’s a step-by-step guide:
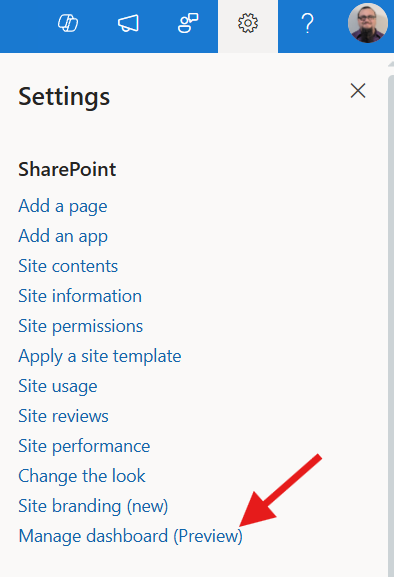
- Access the Dashboard: Go to
 the settings icon on your team site or communication site and click on “Manage Dashboard.”
 - Create the Dashboard: If it’s your first time, you’ll see an intro and a create button. Click “Create” to scaffold out the basic structure.
- Add Cards: In the dashboard
 designer, click on “Add Card” to add different cards to your dashboard. Customize each card as needed.
 - Publish the Dashboard: Once you’re happy with your dashboard, click “Publish.” Your dashboard will now be available on your site.
- Add the Dashboard Web Part: Go to the homepage or any page on your site, enter edit mode, and add the dashboard web part. Position it as desired and republish the page.
Practical Use Cases
The new dashboard feature is incredibly versatile and can be used in various scenarios:
- Departmental Sites: Create a dashboard for each department, letting those users have quick access to relevant files, events, and more.
- Project Sites: Customize the dashboard to display project-specific information, making it easier for team members to stay updated.
- Personalized Experience: Each user can have a personalized dashboard, showing the sites they follow, events relevant to them, and more.
The new customizable dashboard feature in SharePoint could be very impactful. It brings the power of Viva Connections to all your sites, increasing user interaction and productivity. Be sure to watch the video at the top for a detailed walkthrough and check out the official announcement for more insights.
